 By Anna Haefele
In 1978, California passed Title 24, a landmark legislation that unified building codes and mandated energy efficiency for new and modified buildings. For the first time, insulation became obligatory in new construction. However, according to the National Association of Home Builders, roughly half of California homes were built before 1978, which means that millions of homes remain uninsulated. Adding insulation and air sealing in an older home can be a relatively cost effective way to increase energy efficiency, increase comfort, lower costs, and reduce heat-related illness and death during California’s increasingly frequent heat waves.
Insulating My Attic
The house I live in was built in 1973, several years before Title 24 introduced modern, energy efficient building codes. Like many homes, it hasn’t been updated, so it has old, single-pane aluminum frame windows that don’t seal properly along with walls and ceilings that are completely uninsulated. During the winter, it is almost impossible for the heater to keep up with the nighttime chill, and during the summer, the second floor is so hot as to be uninhabitable. Even different times of day result in wildly different temperatures.
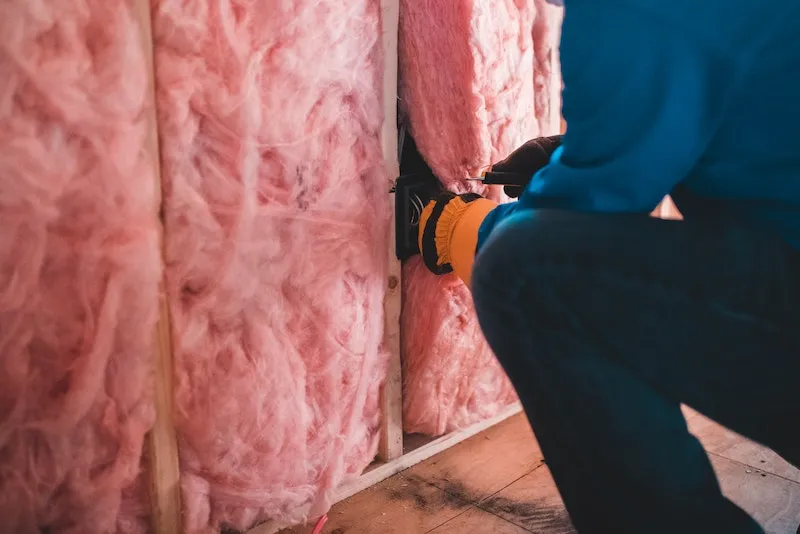
Last month, however, the iffy relationship my house has with temperature stability turned a corner: for the first time in its almost 50-year history, it now has insulation in the attic. The project was pretty smooth and definitely one of the least intimidating home performance improvements I could imagine. However, the retrofit did present some dilemmas and points of debate. The original plan was to opt for spray foam insulation; but since the house may need more work in the future (such as adding an attic fan or conducting electrical upgrades), fiberglass batt ended up being the best option since it is easier to remove and reinstall. This choice opened the possibility of adding insulation as a DIY project, but I ended up working with a professional installer because I was nervous about working with fiberglass in an enclosed space. The installers were also more efficient, so it took them two hours to do what would have taken me a whole weekend. Finally, it took some deliberation to decide what R-value (more on this later) should be installed and whether installing thicker insulation made sense given the cost difference. Ultimately, we went with R-30, which was right for our rafter depth and sufficient for the coastal California climate.

Appearances aside, the most important differences can’t be photographed. Though the windows continue to be outdated and the walls remain uninsulated, I was amazed at how much insulating the attic helped. I can now expect the same temperature upstairs and downstairs, and both areas are amazingly comfortable regardless of the time of day. It’s too soon to tell how much this will impact my gas and electric bill this winter, but my guess is I will see a noticeable difference. Although the house is still far from an energy-efficient utopia, having an insulated attic makes a world of difference, even without insulated walls or improved windows.
My recent experience with insulation (and how great it is!) motivated me to demystify insulation and inspire others to insulate all or part of their home if possible.
How Insulation Works
Insulation serves as a barrier between the inside of a home and outside temperature differentials by slowing the transfer of heat via convection, conduction, and radiation. Air sealing a surface before insulating it (especially in attics) helps maximize the benefits and increase the life of insulation, as well as reduce the leakage of the house.
Heat flows from warm areas to colder areas. In cold weather, insulation and air sealing work together to prevent warmer air from escaping through walls, ceilings, and floors, thus reducing the energy required to maintain a comfortable, safe temperature. In hot weather, insulation and air sealing work in the opposite way, slowing the transfer of heat from outside into the home. Slowing the transfer of energy between the indoors and outdoors can not only improve the comfort, safety, and efficiency of a single residence, but contribute to lowering overall demand on the grid by reducing cooling demand on hot days. According to PG&E and the California Energy Commission (CEC), properly insulated homes can use as much as 50% less energy than uninsulated homes.
Despite the important function insulation serves, many people are not even aware their home is insufficiently insulated because insulation is hidden in walls, floors, and ceilings. Temperature extremes can feel like business-as-usual rather than a deficiency. To raise awareness, the U.S. Department of Energy (DOE) has been encouraging citizens to perform DIY Home Energy Audits.
Types of Insulation
Modern insulation comes in a variety of different types and thicknesses, suited to different uses. The most important difference is the R-value (R stands for Resistance), or how well the insulation material resists heat flow. A higher R-value indicates greater insulating effectiveness. Although the DOE’s R-value recommendations vary by climate zone, R-30 is generally the minimum rating suggested for ceilings in most of California and R-50 is the recommended level, while R-13 is the minimum for typical 2×4 walls that we see in most existing homes. In addition to the R-value, types of insulation also vary in material, which can influence how each type is installed. Common types include bulky fibers like rockwool, cellulose, and fiberglass; rigid foam panels; and spray foam. This flexibility in materials is helpful when trying to retrofit an existing home. For instance, “blown-in” cellulose or fiberglass can be installed without removing drywall.

Benefits vs. Costs
As with the material itself, the costs of upgrading or adding insulation in a home can vary depending on what type is installed, who installs it, how much area needs to be insulated, accessibility, and whether other work is required to accommodate insulation in the walls, attic, or crawlspace. According to Carbon Switch, the average cost per square foot of R-30 fiberglass insulation in California ranges from $0.45 to $1.35, while spray foam insulation ranges from $1.70 to $2.50 per square foot. Accordingly, upgrading a home’s insulation is often one of the least expensive home efficiency upgrades, especially given that even partial upgrades, such as insulating and air sealing the attic, can make a big difference in lowering a home’s energy demand while restraining upfront costs. Beyond the cost savings and reduced carbon footprint, a primary benefit of upgrading a home’s insulation is quality of life. Proper insulation and air sealing dramatically improves a household’s temperature stability and shields residents from extreme temperatures. It can also help with reducing sound transfer, making a home quieter. Effective insulation and air sealing makes a house much more comfortable to live in.
Cover image: Erik Mclean via Unsplash
Editor’s note: this article originally appeared on the EcoBlock blog